First, watch every YouTube video of Sear Cage Assembly you can find from start to finish. Most of them are out of focus or too dark but you can piece together what you need to do it. Don't let the tiny lifter spring fly out!
The Pro Package comes with:
Ring or Race Hammer (decocker version)
Hammer Pins
Short Reset System (Extended Firing Pin, reduced power FP return spring, Reduced power FP block spring, Short reset Lifter, CGW FP Retainer pin, 13# hammer spring)
Reduced Power Trigger Return Spring
Trigger Reach Reduction Kit (Reach Reduction Disconnector, Silver or Black "Old Style" 85C Trigger, trigger assembly slave pin)
Floating Trigger Pin
Grip Screws
I did need to shorten my sear leg slightly to get the SA trigger to reset properly. More details in this post.
https://czfirearms.us/index.php?topic=104051.0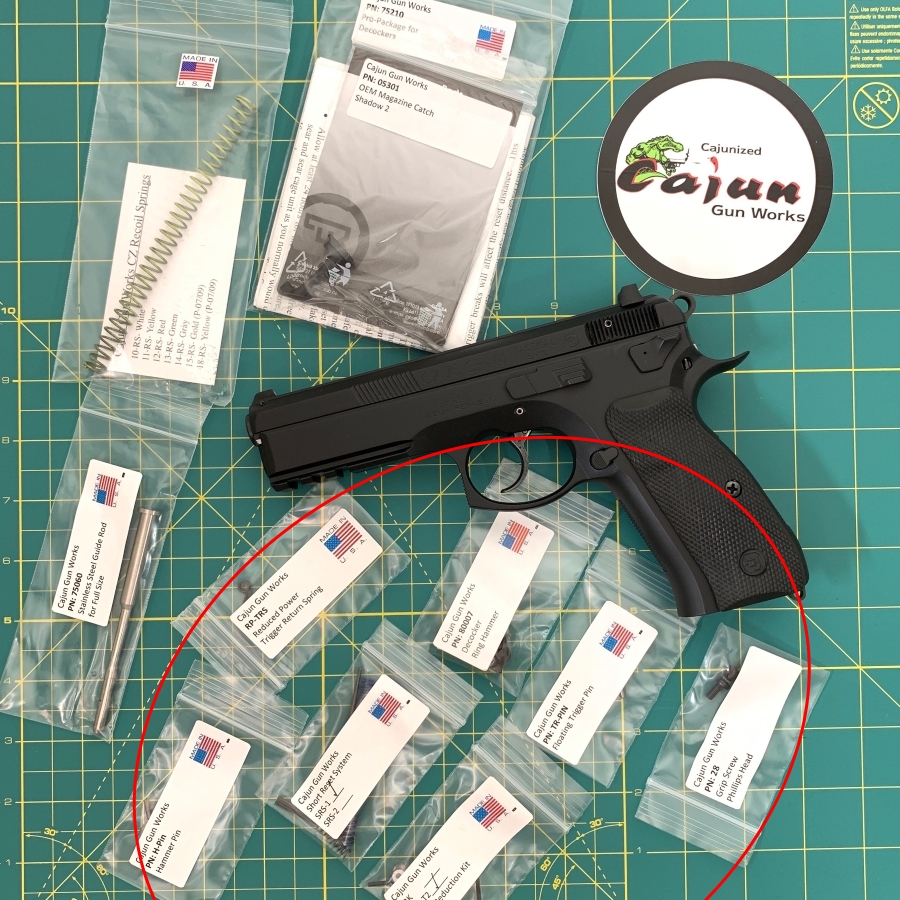
Stuff you need:
Loctite for the trigger pre-travel & over-travel adjustment set screws.
You'll need to pound out your factory hammer pins to reuse the hammer strut, or just buy another hammer strut and keep the old assembly as a spare. The factory hammer pins are staked and need to be removed on a hard surface. I used a flat piece of steel with a hole drilled in it laying on a concrete floor. A "roll of blue tape" isn't going to cut it. The new hammer pins friction fit in my CGW hammer and didn't require staking.(They're hardened anyway and my center punch barely made a dent) You can either get the $7 SP Starter Punch CGW sells to get the OEM pins out, or $9 for a new hammer strut and skip the process.
I was able to remove the factory trigger pin without using the SP Starter Punch but ruined it in the process. Not a big deal though since the Floating Trigger Pin replaces it.
Reassembling the sear cage is a huge PITA until you've done it a few times. CGW sells a slave pin to help. You can get it and the DP starter punch together for $12 in their Decocker Installation Kit. I use the mainspring and sear pins to reassemble the cage, leaving the mainspring pin in when reinstalling in the frame. Then I drive the pin out from right to left using the punch to keep the parts aligned, then drive the sear pin back in from the left while using the punch shaft to keep things oriented.
Consider picking up a spare L-Spring Lifter Spring too. That thing is tiny and easy to lose. I lost mine and found it a few hours later in my bathroom sink when it fell out of my hair!
If you're shooting competitions you might want to pick up an 11.5# hammer spring to lighten the DA pull but it's not required.
While you're at it stuff:
Since I had everything apart, I polished everything with wet sandpaper working up from 800 to 1200 to 2000 grit. I've since gone back over them with wet 3000 grit. Don't just Dremel everything with a felt/polish wheel. The surfaces need to be kept flat. I tape my sandpaper to a pane of glass or a file for narrow spots. Dremel wheels tend to skip off the surface like a tire going down a dirt road. Eventually you end up with a microscopic washboard road. It might feel slick, but the waviness will be felt during the trigger pull.
Since this will be my USPSA Carry Optics gun, I also picked up an 11# recoil spring for minor loads, a stainless guide rod, and a Shadow2 Mag release, all from CGW.