Several folks have asked me questions about rust bluing (on this forum and elsewhere) so I thought I'd share my process. Hopefully this will inspire some to do their own projects. There's a ton of posts out there that go in to the fine details so I won't waste your time with that. I doubt that this will teach bluing veterans anything new, but this is what works for me.
The project gun this time is an early 70s vintage Dan Wesson mdl. 15 that I picked up not too long ago. It hasn't been shot much, but definitely wasn't stored well. There is zero collector value in this one. From a distance it doesn't look bad, but the freckling in the finish is all over it. I have considered just cleaning it up and leaving it as is, but knowing how the finish is would drive me nuts over time.
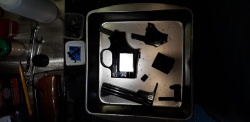
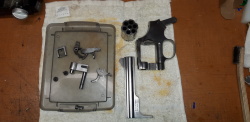
So, here's the patient. Doesn't look too bad, right?

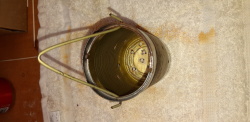
The first step is to tear it down, degrease it with carb cleaner and acetone, throw it in a pan and cover it with evap-o-rust to remove the factory bluing.
This was a first for me. After rinsing the evap-o-rust off I put the parts in a toaster oven to dry them. The parts that I assume are mim had oil leaching out of them. It took three cyles of cleaning and baking to get it all out/off.
Remember that freckling I mentioned? It was worse than I thought. Nothing some filing and sanding couldn't clean up. I really couldn't do much with the flats without making them look worse, so those were just lightly draw filed where I could.
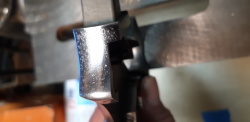
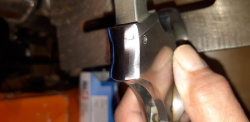
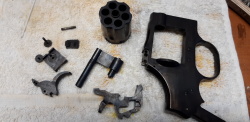
When it comes to sanding, the first two guns I did all the way up to 800 grit. The next couple I went to 600 grit. Then I stopped after 400 grit on the next one, and I could not discern any difference in finish level between it and the 800/600 grit. So now I don't waste my time going past 400. I do, however, chuck up a soft wire wheel in the drill press at 600 rpm and go over everything with it. I've found that it helps to even things out. Here's the parts ready to start rusting
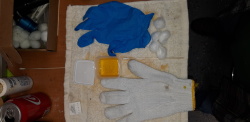
I use Mark Lee's Express Blue. I've tried others but keep coming back to it. I can usually get 4 handguns done with one bottle. The other supplies are pretty basic and inexpensive. Grab a pack of cotton and vinyl gloves from Harbor Freight. Cotton balls work great for applying the solution and q-tips are handy for getting in nooks and crannies. You'll also want a small container to pour some solution into.
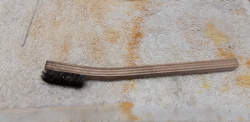
One thing I don't cheap out on is the carding brush. I've tried steel wool, but the Brownell's carding brush just plain works better. Coat hangers and alligator clips with wires attached come in handy.
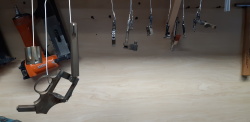
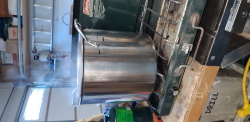
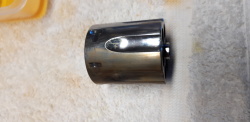
Here's the other hi-tech equipment I use. The old Coleman stove and a dollar store stainless pot, and a soup can with holes drilled in it to hold the small parts while boiling. I've found that the 80 cents a gallon distilled water from Walmart does the job just fine.
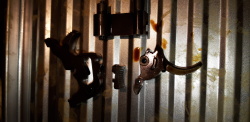
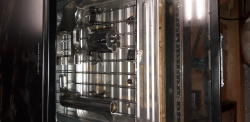
Some people use a torch and others use a heat gun to warm the parts up. I prefer to use an inexpensive toaster oven set at 165 degrees. This way I can pull one part at a time, apply the solution, hang it up and do the next one, with the heat staying constant the entire time. It only takes about a 10 minute bake to heat the parts. You want to squeeze out the cotton ball and just apply a light coat of solution. If it sizzles when you apply it then the metal is too hot. It should dry almost instantly, but not sizzle. Here's what a first coat looks like.
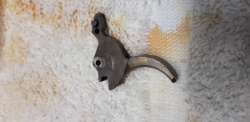
I typically let the parts hang for 30 to 45 minutes. This is the first rust on the trigger. Not much rusting on this first pass, which tells me that this is going to be a long process.
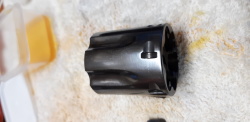
I boil in the distilled water for 5 to 10 minutes. I don't suspend the parts or anything else fancy. Just drop them in and sit on the bottom of the pan. This is after the 5th boiling, and what the cylinder looks like after carding.
This is going to take a lot of cycles - probaly 10 or 12. I was running out of time, so I did a 6th rust/boil cycle, then put the un-carded parts in a zip lock bag, where they'll sit until this weekend and I can get back on them. I'll continue this post then.


