A little late on getting these posted, but here are the comparison pics I promised.
Trigger sets. Early VZ2008 top and newer bottom. Note that bottom has a more ramped rear to prevent the bolt carrier from jumping the disconnector when trigger is held to the rear. Also, that nub sticking out on the disconnector grabs the sear.

In this pic (of the Bonesteel/CNC Warrior Sear, not my pic -- it's very similar to the century -- the red circle is what is grabbed by that nub on the disconnector -- when pulling trigger rear, disconnector moves forward which grabs the sear and rotates the sear down). The green circle is what grabs the striker, and the arrow would be roughly up in your receiver.
When pulling the trigger, the initial takeup is what you feel until the disconnector touches the sear part in that red circle and the disconnector engages the sear from the side visible in the pic... Only tension you feel in first stage is from disconnector spring compressing and also causing friction between the disconnector and safety as disconnector pushes up against safety in that safety groove.
The spring tension from the levers and friction between the sear and striker would be the 2nd stage until striker moves forward. You would feel these in harmony. By polishing and greasing sear/striker, you'd minimize that friction and primarily just dealing with spring tension at that point (well tension from stage 1 remains/is cumulative but it's very minimal).
Polishing the face of that sear ledge (the one oriented up and down) in center of green circle and greasing there
should improve trigger function while also remaining safe while also polishing forward portion of lower striker that interacts with the sear (you are responsible for your modifications to your firearms. Proceed AT YOUR OWN RISK and ensure proper trigger function PRIOR TO PUTTING AMMO IN THE WEAPON!). You could also polish disconnector/safety parts that interact (upper ledge of disconnector behind the hump and safety groove) and grease those but benefits will be minimal as you can feel with very light initial trigger pull. Greasing sear pin and/or polishing internal sear hole wouldn't hurt either. Same for trigger pin/sear hole (remember to remove the very small roll pin holding in your trigger pin before hammering on it... I made that mistake the first time I disassembled and it resulted in lateral trigger movement after install... Fortunately, that pin is long enough to be reversible, put dented end up.).
After striker moves forward and gun fires, you then have to
1) release the trigger to reset so that the trigger moves forward far enough for
2) that nub on the disconnector to move far enough back to grab/re-engage the sear lip.
To mess with reset distance, you would have to play with disconnector nub locations and/or sear lower lip locations/angles. Conceptually, the further forward the lower sear lip or the further back the disconnector nub, the shorter reset you'll have. Again, only alter fire control group components AT YOUR OWN RISK. *For polishing I'm talking very light, like a little flitz paste or 1000+ grit sandpaper enough to smooth... REITERATING AT YOUR OWN RISK and TEST FUNCTION BEFORE PUTTING AMMO IN THE WEAPON! Every weapon is unique and concepts don't always translate to practical effectiveness, nor have I T&Eed these mods yet.

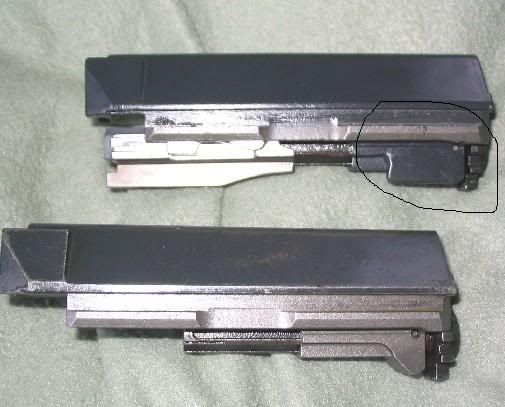
Except for when the sear grabs the striker, spring tension holds the striker tightly to the rear of the bolt carrier -- the striker crosses the sear when moving to the rear and can push it down so much that the sear re-engages with the disconnector, begin held down. The downward protrusion of the bolt carrier immediately before the striker is what releases the disconnector from the sear (allowing the sear to spring up under pressure of the lever springs -- it hits that upward hump on the disconnector). When the bolt carrier rearward travel causes sear-disconnector re-engagement, you can get the gremlin as there is not enough time/distance between that downward protrusion of the bolt carrier and the striker for that re-release to be effective, hence the tab which causes the release earlier allowing sufficient time for the sear to rise to catch the striker:
(Not my pic)

Safeties -- newer VZ2008 top and earlier bottom. The safeties and or trigger packs can move horizontally, which prevents the disconnector from rising (gap on safety would face down) so that the trigger can pull. The more recent one has this gap widened considerably to prevent horizontal movement from preventing the weapon from firing, earlier just had a small ramp ground to guide it into the notch. Neither add'l grinding is present on OEM.

EDIT: Looked at earlier again today, and I'm confident that those bevels (both side on semi auto slot, one side on full auto) are in fact the factory design -- so original safety was unmodified...
Disconnector -- this is a demo model full auto trigger, so ignore the cutout -- it's specific to the demo, wouldn't be there on OEM weapons and just is there to allow you to see the disconnector/sear interaction. Regardless, the Century and OEM disconnector on the early versions are identical -- no difference in heights or lengths to the rear where it matters or the nub locations...

Trigger -- Century uses OEM triggers but grinds them to prevent full auto component installation. Here you can see grinds -- cut off far left ledge in pic, and cut down from left disconnector in pic and then across as well to notch out the top 1/2 of that portion of the trigger. *And you'd need to do substantial modification to your receiver to fit in the full auto components as well. Don't do it.
